Example Apps for Businesses, Schools & Developers

Versions 1.1 / 1.3           Approx 0.9 MB (zipped)                 First Published 20 May 2025                 Last Updated 12 Jun 2025


In a previous article, Highlight Current Record in Continuous Form, I showed how the current record could be highlighted using just one line of code together with conditional formatting.
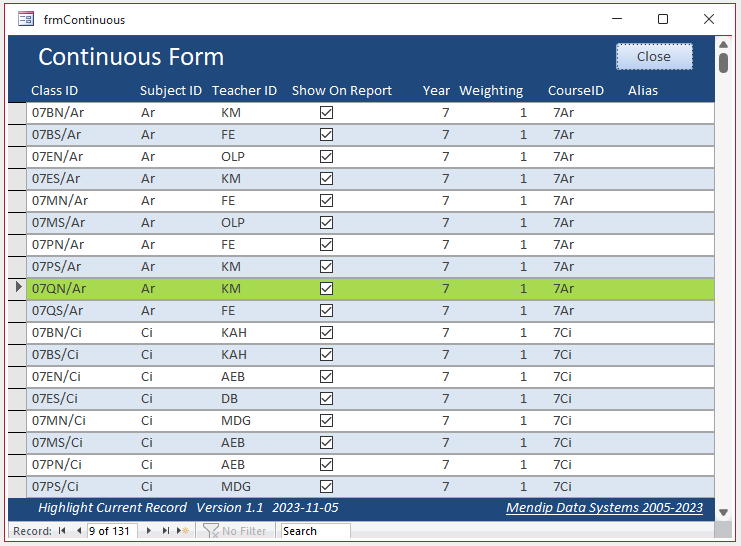
Highlight Current Record
In a separate article,Paint Me Transparent, I demonstrated how individual controls in a continuous form could be hidden using the transparency property of command buttons.
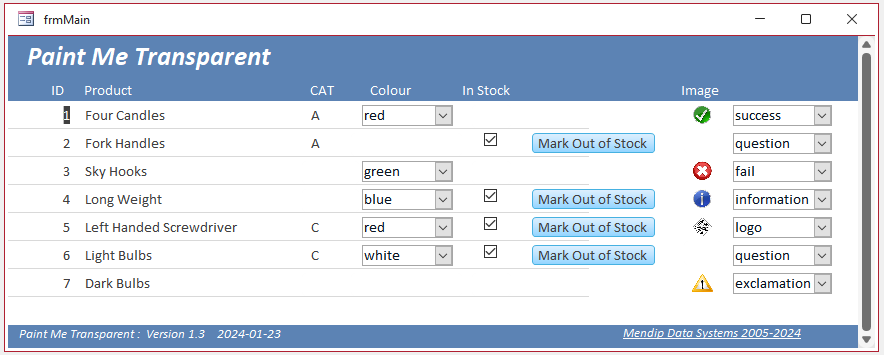

Paint Transparent


In this article, I will combine these ideas to show how transparency can be used to highlight the current record in a continuous form.
More accurately, I will show how the current record can be highlighted by disabling transparency for a button border.
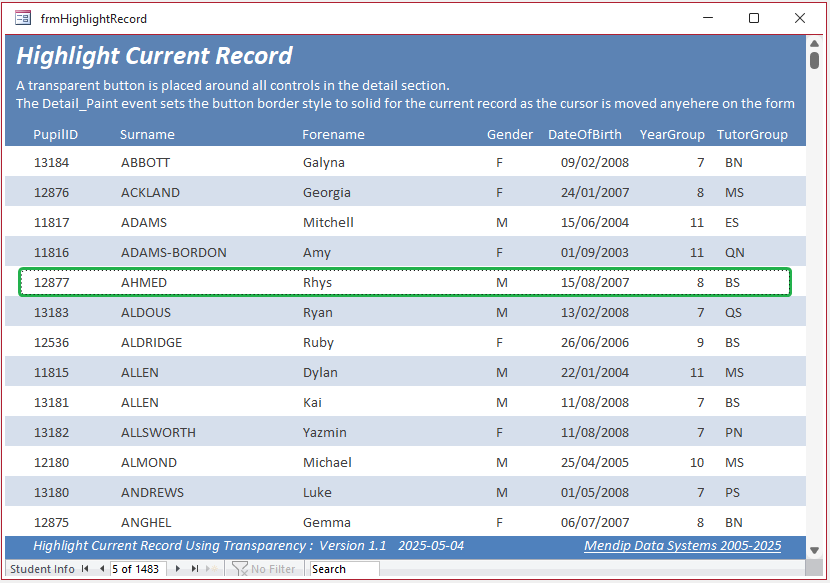
Highlight Current Record Using Transparency
To achieve the above effect, add a command button to the detail section of the form and change its shape to use e.g. rounded corners.
Adjust the size and height of the button to match that for the form detail.
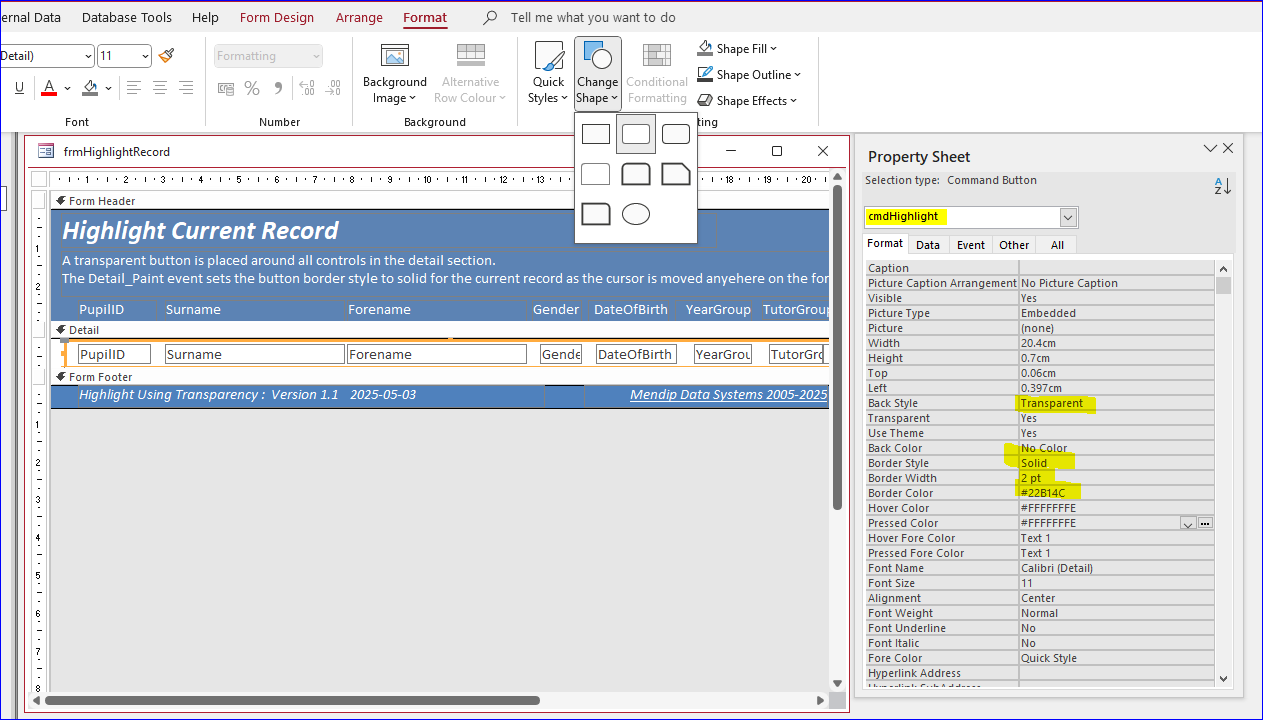
ButtonDesignView
Now set the button back style to transparent and the border style to solid. I have used a border width = 2pt and a green border color.

Each record MUST have a unique field, in this case PupilID. The field can be hidden if preferred.

A hidden unbound textbox, RecNo, is also required. Place this anywhere on the Detail section.

Add the following code to your form:

'set current record
Private Function SetRecordHighlight()
RecNo = PupilID
End Function

Private Sub Detail_Paint()
'set border transparent for all except the current record
Me.cmdHighlight.Transparent = RecNo <> PupilID
End Sub


Also set the button GotFocus event to the function SetRecordHighlight:
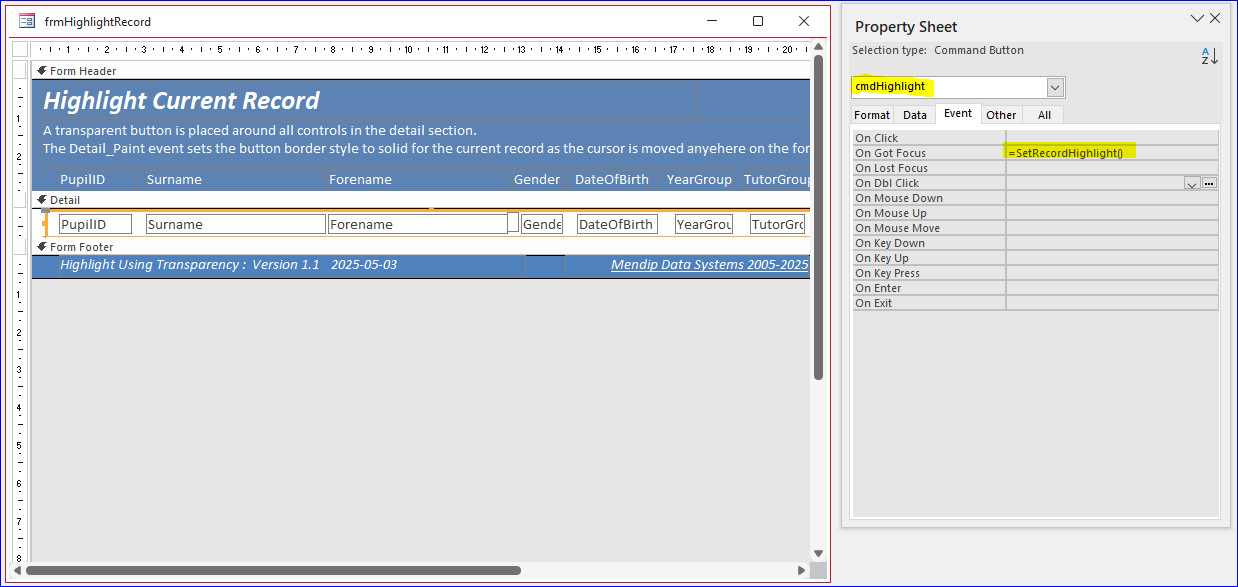
Button GotFocus event
When the user clicks anywhere on a record to make it the current record, the button GotFocus event fires and sets the value of the hidden control RecNo equal to the PupilID.

The Detail_Paint event then runs and sets the button transparent for all records except the current record. In other words, for all records where RecNo <> PupilID.

For the current record, the button transparency is set false. However this only makes the button border solid green as the back style remains transparent.


NOTE:
As an alternative, you can use a rectangle (box) control instead of a command button. This will have square corners. However, the box control has a wider choice of border styles e.g. dot-dash
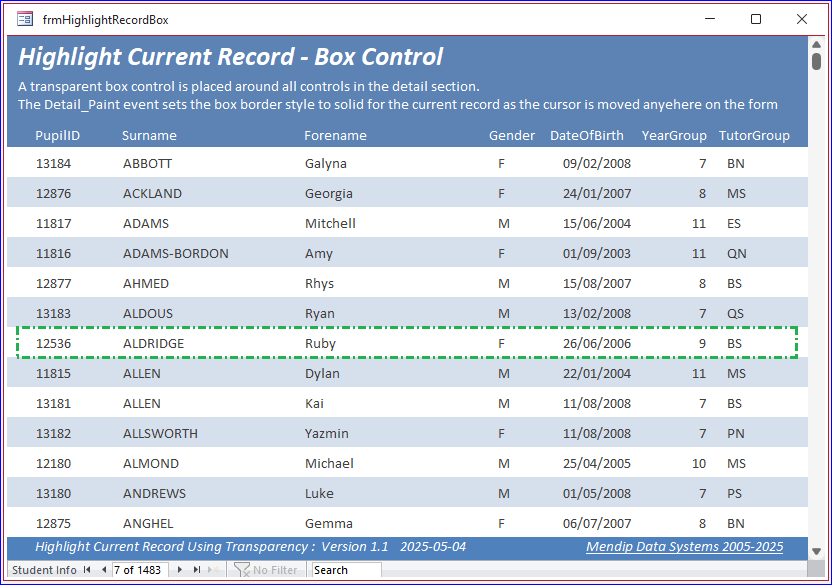
Highlight Current Record - Box Control
In this example, the following code is used:

'set current record
Private Function SetRecordHighlight()
RecNo = PupilID
End Function

Private Sub BoxHighlight_Click()
SetRecordHighlight
End Sub

Private Sub Detail_Paint()
'set border solid (1) for the current record and transparent (0) for all other records
Me.BoxHighlight.BorderStyle = Abs(Nz(RecNo, 0) = Nz(PupilID, 0))

'OR for other border styles, multiply by the appropriate value
'2 = dashes, 3 = short dashes, 4 = dots, 5 = sparse dots, 6 = dash dot, 7 = dash dot dot
'https://learn.microsoft.com/en-us/office/vba/api/access.rectangle.borderstyle
' Me.BoxHighlight.BorderStyle = 6 * Abs(Nz(RecNo, 0) = Nz(PupilID, 0))
End Sub


For the current record, the expression RecNo = PupilID is true (-1)

For a solid border, we set the border style = 1 by using the Abs function: Abs(RecNo = PupilID)
For other border styles, we just multiply the expression by the required value = 6 for dash-dot

See the border style documentation at Rectangle.BorderStyle property (Access)


Yet another highlighting approach is to underline the current record:

Underline Current Record
This works in a similar way to the rectangle (box) control

Underline Design View
Lines do not have event procedures but the border style can still be set in the Detail_Paint event.

The line border style is set transparent (0) for all except the current record.

For the current record, the border style is set to solid (1) or any other preferred value up to 7

'set current record
Private Function SetRecordHighlight()
RecNo = PupilID
End Function

Private Sub Detail_Paint()

'set line border solid (1) for the current record and transparent (0) for all other records
Me.LineHighlight.BorderStyle = Abs(Nz(RecNo, 0) = Nz(PupilID, 0))

'OR for other line border styles, multiply by the appropriate value
'2 = dashes, 3 = short dashes, 4 = dots, 5 = sparse dots, 6 = dash dot, 7 = dash dot dot
'https://learn.microsoft.com/en-us/office/vba/api/access.line.borderstyle
' Me.LineHighlight.BorderStyle = 3 * Abs(Nz(RecNo, 0) = Nz(PupilID, 0))
End Sub


In the screenshot below, the border style is set to short dashes (3)

Dash Underline Record

NOTE:
A companion article shows how a similar approach can be used to highlight / underline the current control in a continuous form using transparency:
      Highlight Current Control Using Transparency


UPDATE 12 Jun 2025 - Version 1.3

Following a request from another developer, I have modified the forms to allow end users to select the border / line style and color at run time.

Select Border Style - Current Record

Select Border Color - Current Record
On closing the form, users can choose whether to save the changes to border style and color

Save Border Style & Color
The same options can also be applied to the form which underlines the current record:

Select Line Style - Current Record

Select Line Color - Current Record
If required, it would be very easy to add another combo for users to select the border / line weight (Hairline to 6 pt)


Download

Click to download:
      Highlight Record Using Transparency             Version 1.1     ACCDB file     Approx 0.9 MB   (zipped)

      Highlight Record Using Transparency_v1.3    Version 1.3     ACCDB file     Approx 0.9 MB   (zipped)

As is the case for all files downloaded from the internet, first unblock the downloaded file, unzip then save to a trusted location


Feedback

Please use the E-Mail button in the contact form below to let me know whether you found this article useful or if you have any questions.

Please also consider making a donation towards the costs of maintaining this website. Thank you


Colin Riddington           Mendip Data Systems                 Last Updated 12 Jun 2025


Return to Example Databases Page


Return to Top